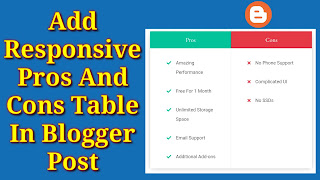
A Pros & Cons Table gives a quick summary view of advantages and disadvantages of a product. It is especially useful in review posts where you are giving your opinion on any product or service.
You can see many popular review blogs use Pros & Cons Table to give you a quick summary of products or service. It not only serves to explain a content well, but also helps in explaining the details of the post to the reader.
If you also want to add Pros & Cons Table to your blog. So this article will help you a lot because today I will teach you how you can add Pros & Cons Table to your blogger post. That too by following easy steps.
How To Add Responsive Pros And Cons Table In Blogger Post
- Login to your blogger blog Dashboard.
- Then go to Theme > > Edit HTML.
- Click anywhere inside the code area and press Ctrl + F keys to open the search box.
- Now, Search for <head> tag and paste below code just After of this tag.
<link rel="stylesheet" href="https://cdnjs.cloudflare.com/ajax/libs/font-awesome/5.15.1/css/all.min.css" crossorigin="anonymous"/>
- Now, Search for ]]></b:skin> Or </style> tag and paste below code just above of this tag.
/*== Pros And Cons Table By tggyan.in ==*/
.pros-cons-container {font-family: "Roboto", sans-serif;display: flex;max-width: 700px;margin: 32px auto;box-shadow: 0 4px 16px -4px rgba(0, 0, 0, 0.4);}
.pros-cons-container .heading {font-size: 20px;text-align: center;color: #fff;margin: 0;padding: 16px 24px;}
.pros-cons-container .pros-container .heading {background: #02c39a;}
.pros-cons-container .cons-container .heading {background: #e63946;}
.pros-cons-container .pros-container ul li::before {content: "\f00c";font-family: "Font Awesome 5 Free";font-weight: bold;padding-right: 16px;color: #02c39a;display: block;}
.pros-cons-container .cons-container ul li::before {content: "\f00d";font-family: "Font Awesome 5 Free";font-weight: bold;padding-right: 16px;color: #e63946;display: block;}
.pros-cons-container .pros-container,.pros-cons-container .cons-container {flex: 1;}
.pros-cons-container .pros {border-right: 1px solid #eee;}
.pros-cons-container ul {padding: 8px 0;list-style: none;margin: 0;}
.pros-cons-container ul li {padding: 16px 32px;font-size: 16px;line-height: 2;display: flex;}
@media (max-width: 530px) {.pros-cons-container {flex-direction: column;}
.pros-cons-container ul li:nth-of-type(2n) {background: #eee;}}- Click Save Theme.
- Open Blogger Dashboard And Open The Post In Which You Want To Add Pros And Cons Table.
- Now Go To HTML >> And in the post where you want to add Pros And Cons Table, paste the code below.
<div class="pros-cons-container"><div class="pros-container"><h2 class="heading">Pros</h2><ul class="pros"><li>Pros Text</li><li>Pros Text</li><li>Pros Text</li></ul></div><div class="cons-container"><h2 class="heading">Cons</h2><ul class="cons"><li>Cons Text</li><li>cons text</li><li>cons text</li></ul></div></div>
- Replace "Pros Text" "Cons Text" with the Text want to share.
- before publish your post see a preview of your blog post.
- If preview is correct then simply publish it.


